The X posts scraper extracts a single X post by URL. It returns text, author data, media, engagement counts, quoted post metadata, and profile fields.
Data teams use it for social listening, creator tracking, post audits, and post-level analytics. ScrapeNow handles the X scraping stack, request retries, browser behavior, and parsing layer.
How to use this scraper
ScrapeNow’s Extract X post data scraper takes one input field, the post URL. You can run it from the dashboard or call it through the API with the scraper slug the X Posts Extract by URL scraper.
Use this scraper when you already have status URLs from monitoring tools, exports, alerts, saved lists, or another X collection workflow. The scraper expects direct post URLs, not search terms or profile handles.
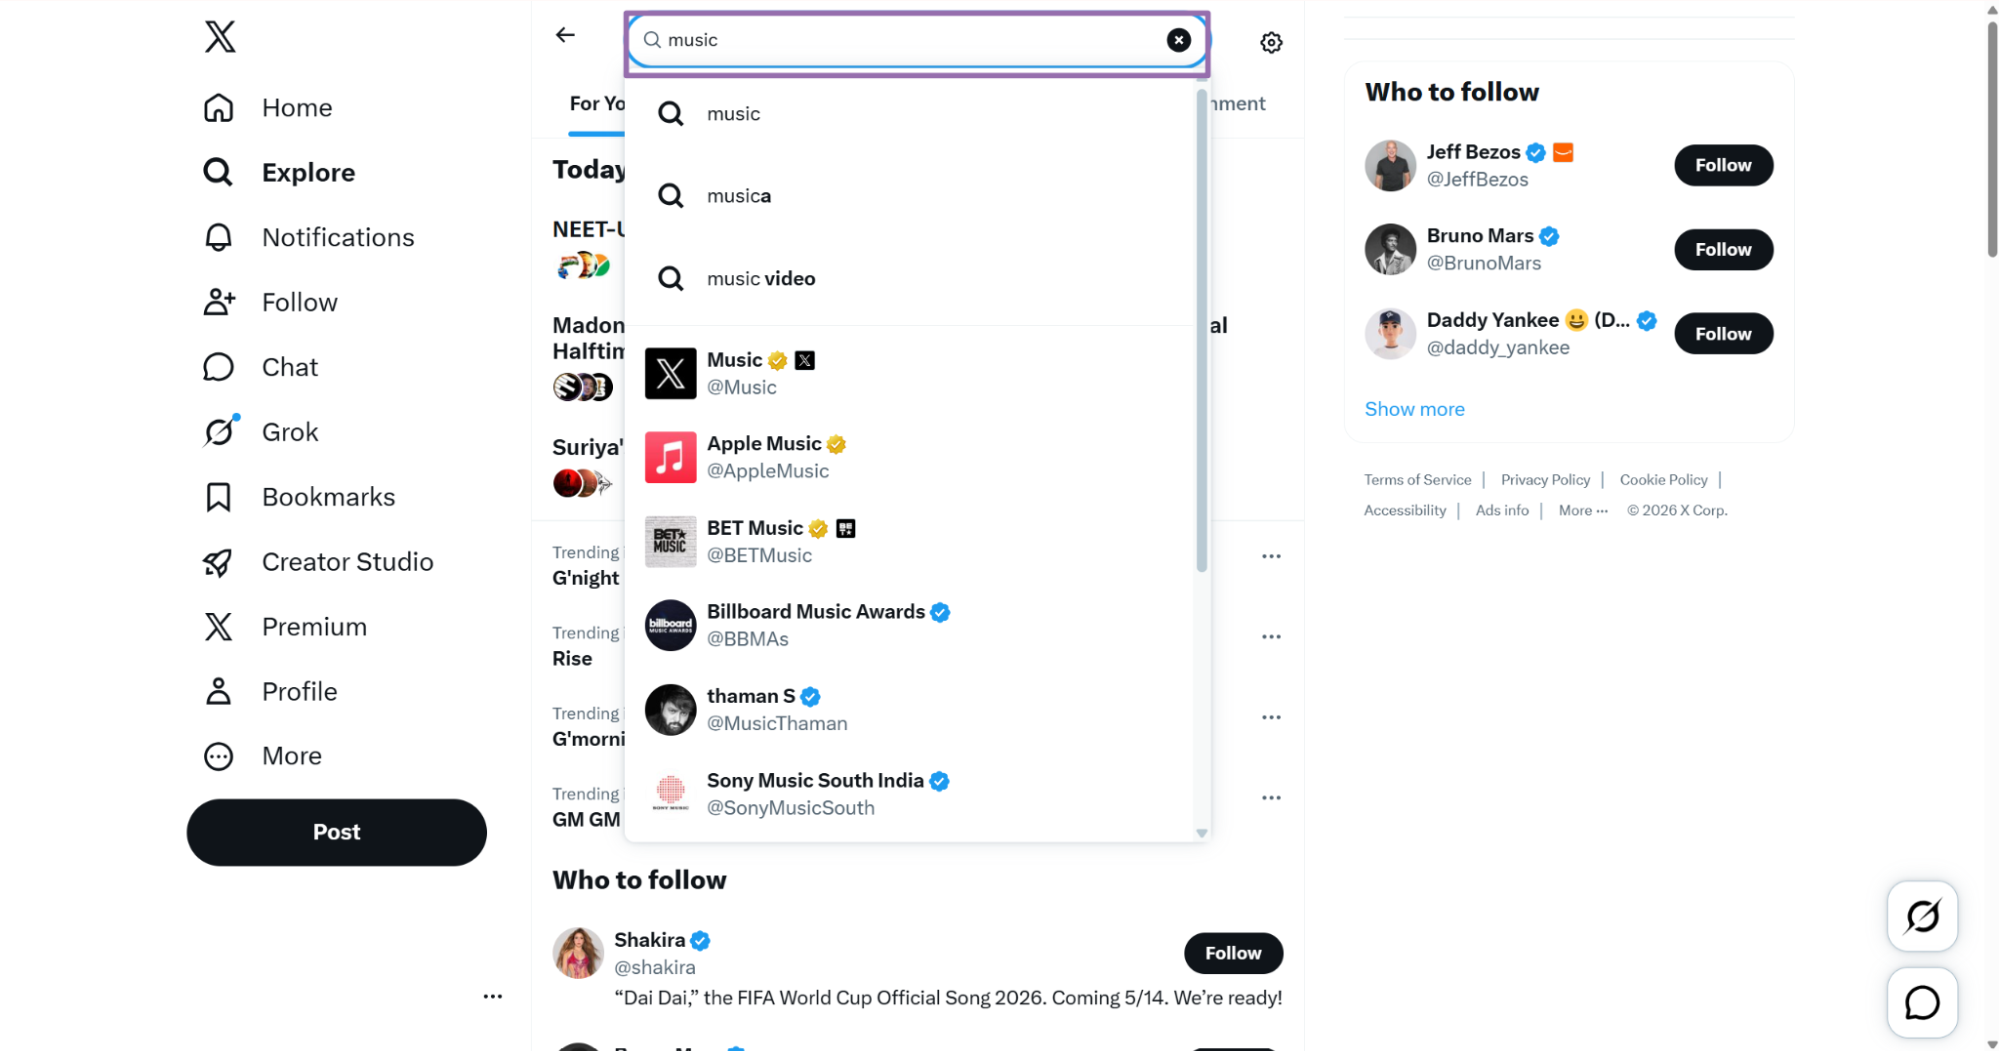
Step 1. Find the X post URL
Open x.com.
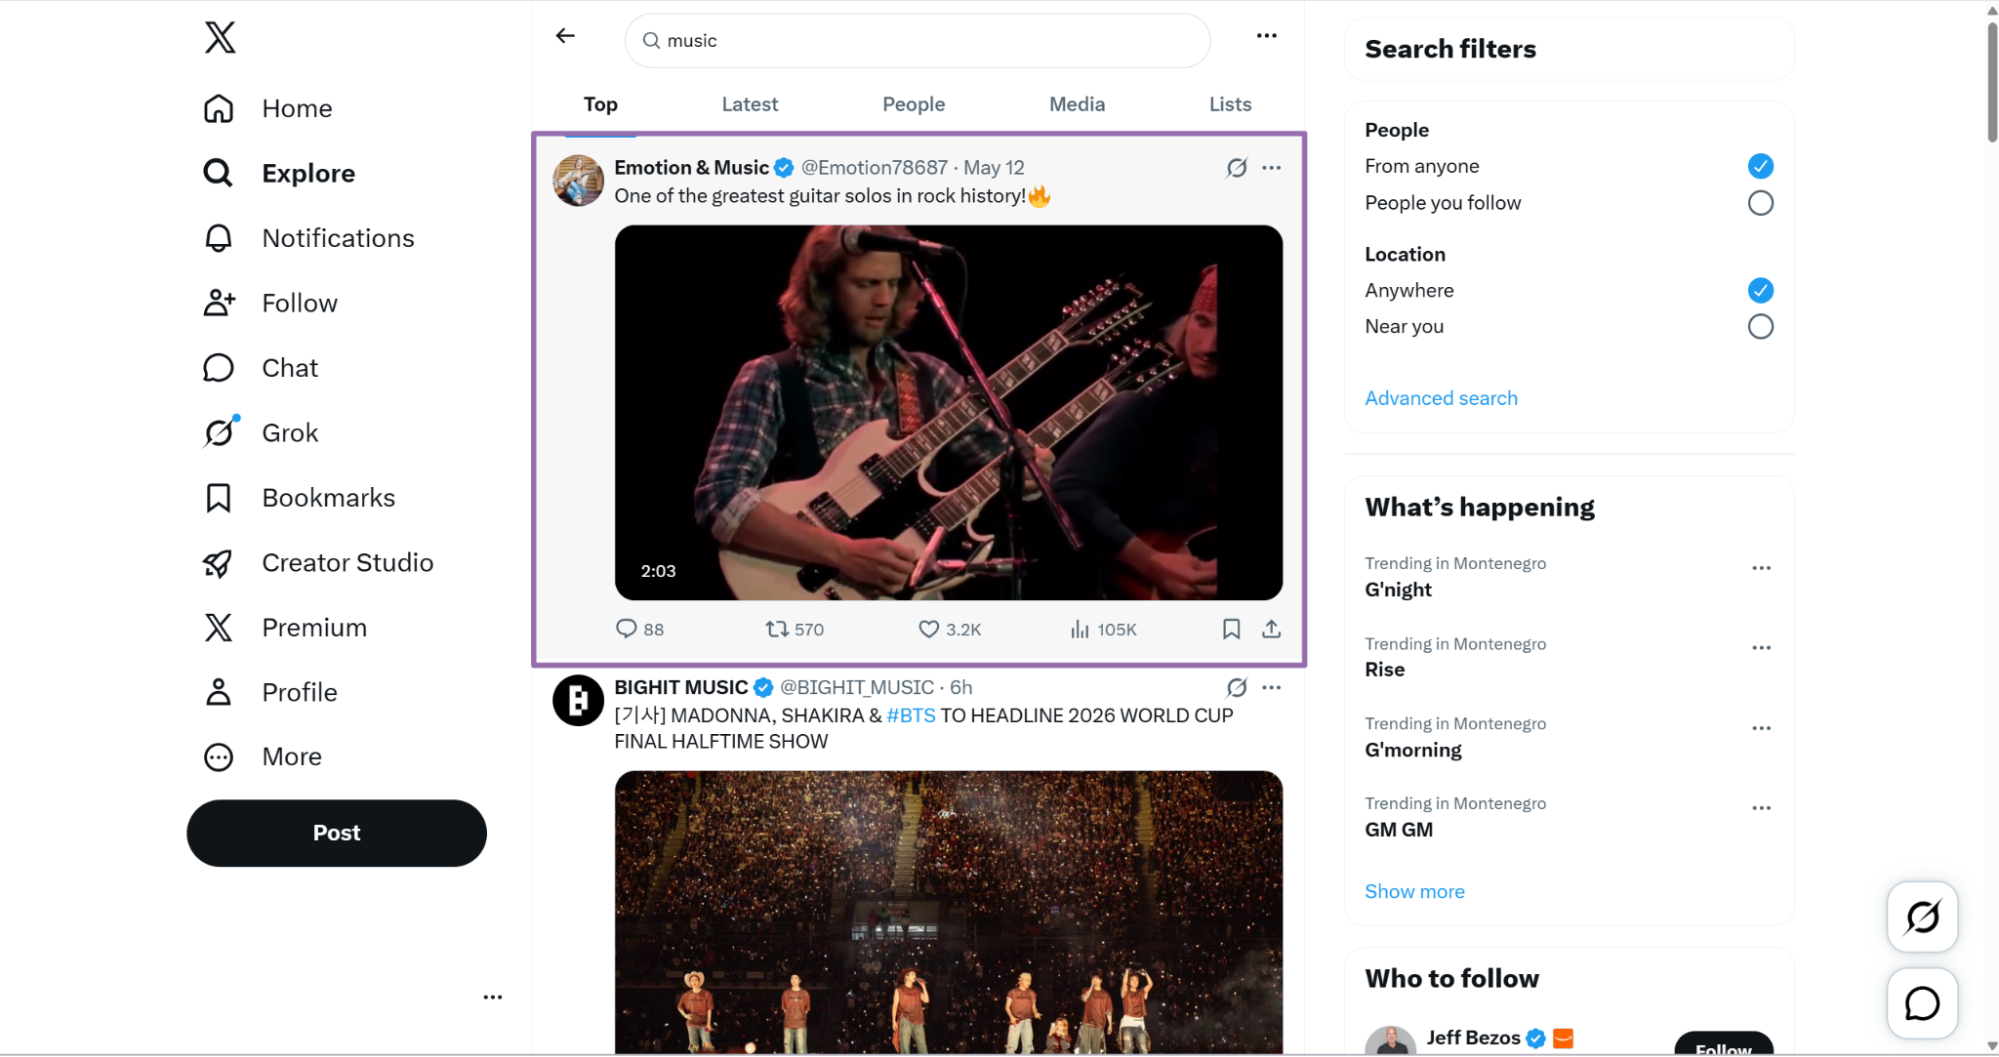
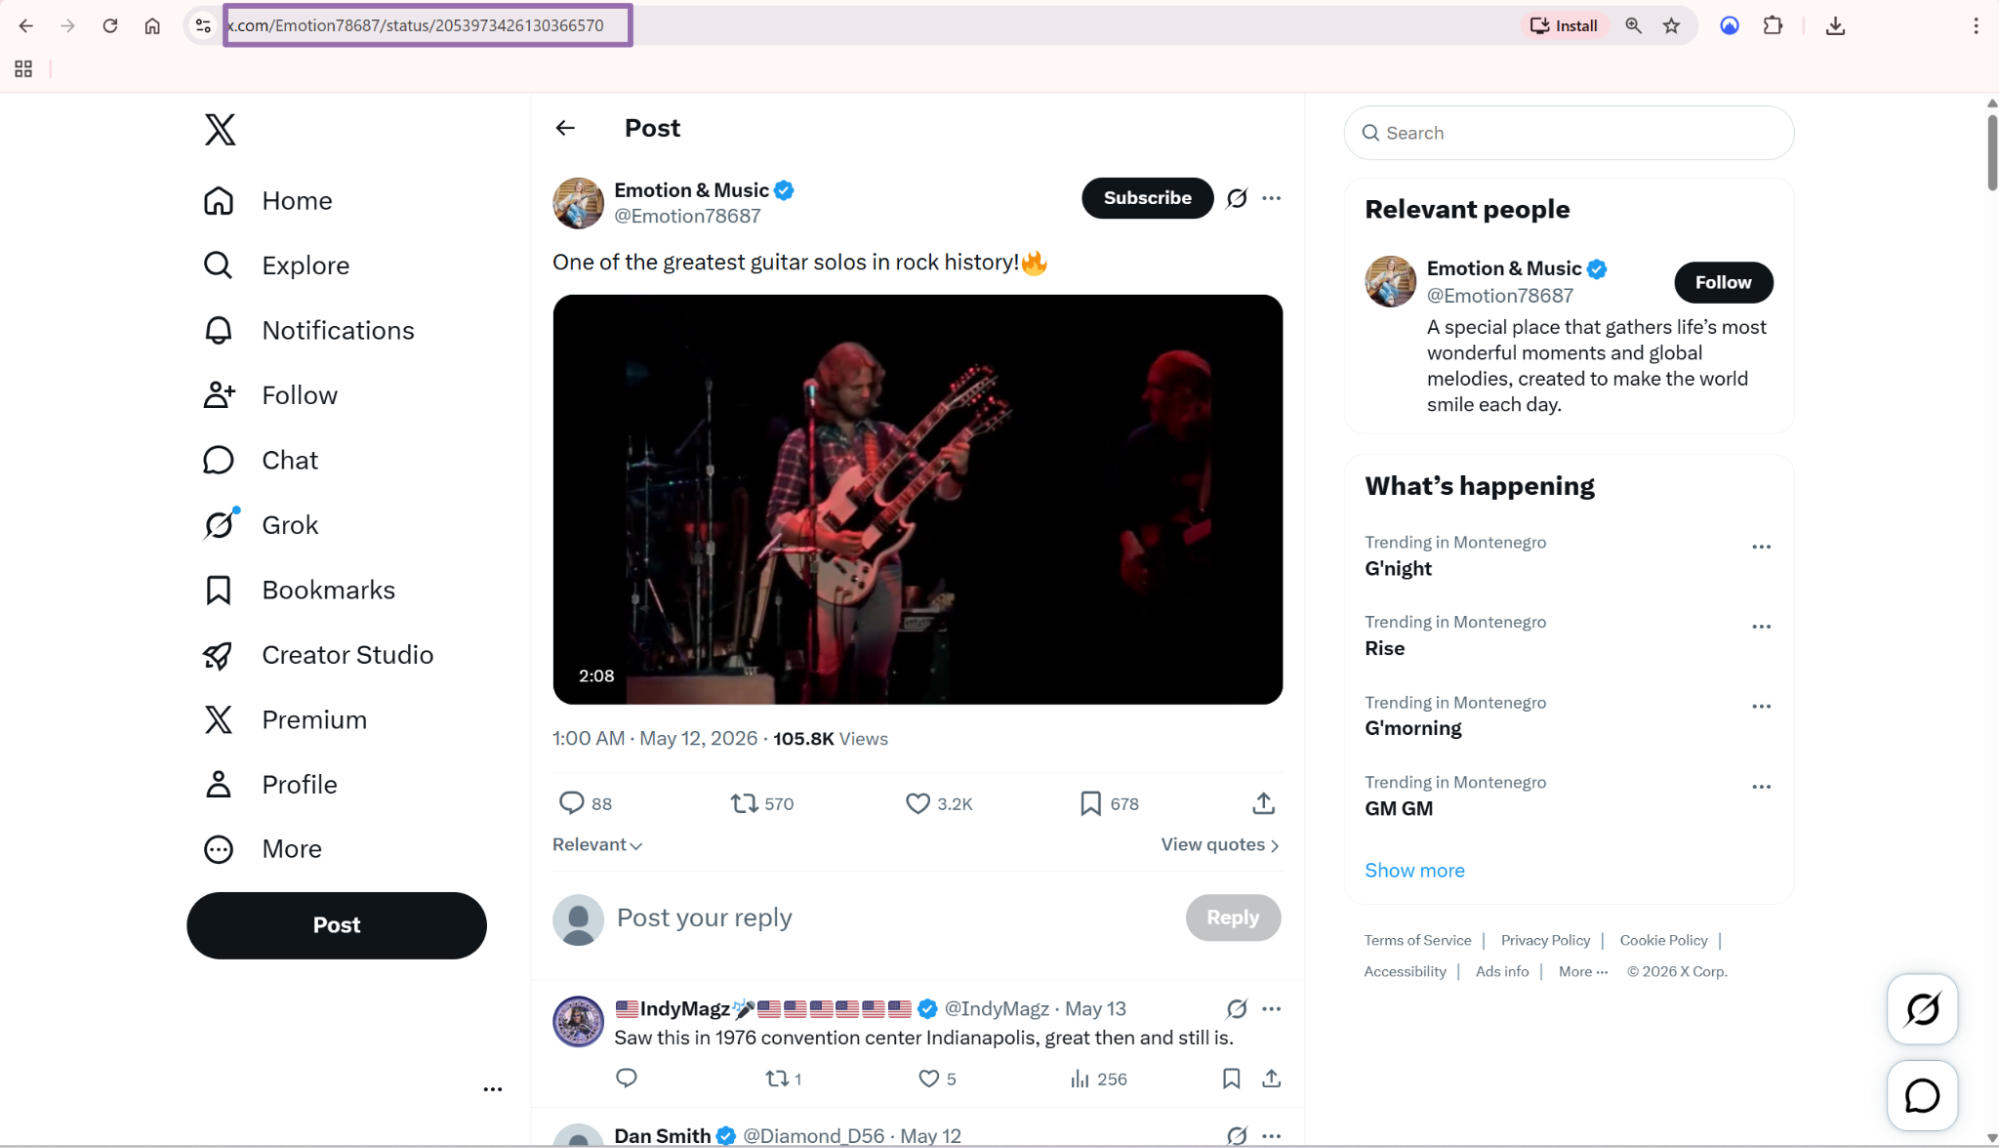
https://x.com/taylorswift13/status/2019758757723422893
Use the full status URL. The scraper reads the post ID from the URL and returns the post plus related author fields.
Remove tracking parameters before you store the URL. A copied X link often includes ref_src, s, or other query parameters that create duplicate inputs.
Step 2. Run the scraper with the API
Use this Python script with Python 3.10 or newer. Replace YOUR_API_KEY with your ScrapeNow API key.
"""
Configuration:
    - Set SCRAPER_SLUG to the scraper you want to run.
    - Set SCRAPER_INPUTS to the input dicts for that scraper.
    - Set API_KEY to your Scraper API key.
"""

import sys
import time
import json
import requests
import os

API_KEY = "YOUR_API_KEY"

SCRAPER_SLUG = "x.com-posts-extract-by-url"

SCRAPER_INPUTS = [
    {
        "url": "https://x.com/taylorswift13/status/2019758757723422893"
    }
]


BASE_URL = "https://api.scrapenow.io/api/v1/scraping"
TIMEOUT_SECONDS = 3600
POLL_INTERVAL = 5
SPINNER = "|/-\\"


def build_headers(api_key: str, content_type: str | None = None) -> dict:
    headers = {"Authorization": f"Bearer {api_key}"}
    if content_type:
        headers["Content-Type"] = content_type
    return headers


def trigger_scrape(slug: str, inputs: list[dict]) -> str:
    url = f"{BASE_URL}/scrape?scraper={slug}"
    response = requests.post(
        url,
        headers=build_headers(API_KEY, "application/json"),
        json={"inputs": inputs},
    )
    response.raise_for_status()
    return response.json()["data"]["job_id"]


def poll_until_done(job_id: str) -> str:
    start = time.time()
    i = 0
    while True:
        elapsed = time.time() - start
        if elapsed > TIMEOUT_SECONDS:
            print(f"\nTimeout after {TIMEOUT_SECONDS}s")
            sys.exit(1)
        response = requests.get(
            f"{BASE_URL}/jobs/{job_id}",
            headers=build_headers(API_KEY),
        )
        response.raise_for_status()
        data = response.json()
        status = data["data"]["status"]
        mins, secs = divmod(int(elapsed), 60)
        sys.stdout.write(
            f"\r[{SPINNER[i % 4]}] Waiting... {status} ({mins}m {secs:02d}s)  "
        )
        sys.stdout.flush()
        if status in ("completed", "failed"):
            print()
            return status
        time.sleep(POLL_INTERVAL)
        i += 1


def fetch_results(job_id: str) -> dict:
    response = requests.get(
        f"{BASE_URL}/jobs/{job_id}/results?format=json",
        headers=build_headers(API_KEY),
    )
    response.raise_for_status()
    return response.json()


def save_results(data: dict, slug: str) -> str:
    os.makedirs("output", exist_ok=True)
    filename = os.path.join("output", f"{slug}.json")
    with open(filename, "w", encoding="utf-8") as f:
        json.dump(data, f, indent=2, ensure_ascii=False)
    return filename


def main() -> None:
    print(f"Triggering scraper: {SCRAPER_SLUG}")
    job_id = trigger_scrape(SCRAPER_SLUG, SCRAPER_INPUTS)
    print(f"Job started: {job_id}")
    final_status = poll_until_done(job_id)
    if final_status != "completed":
        print(f"Job failed with status: {final_status}")
        sys.exit(1)
    print("Fetching results...")
    results = fetch_results(job_id)
    output_file = save_results(results, SCRAPER_SLUG)
    print(f"Results saved to: {output_file}")


if __name__ == "__main__":
    main()
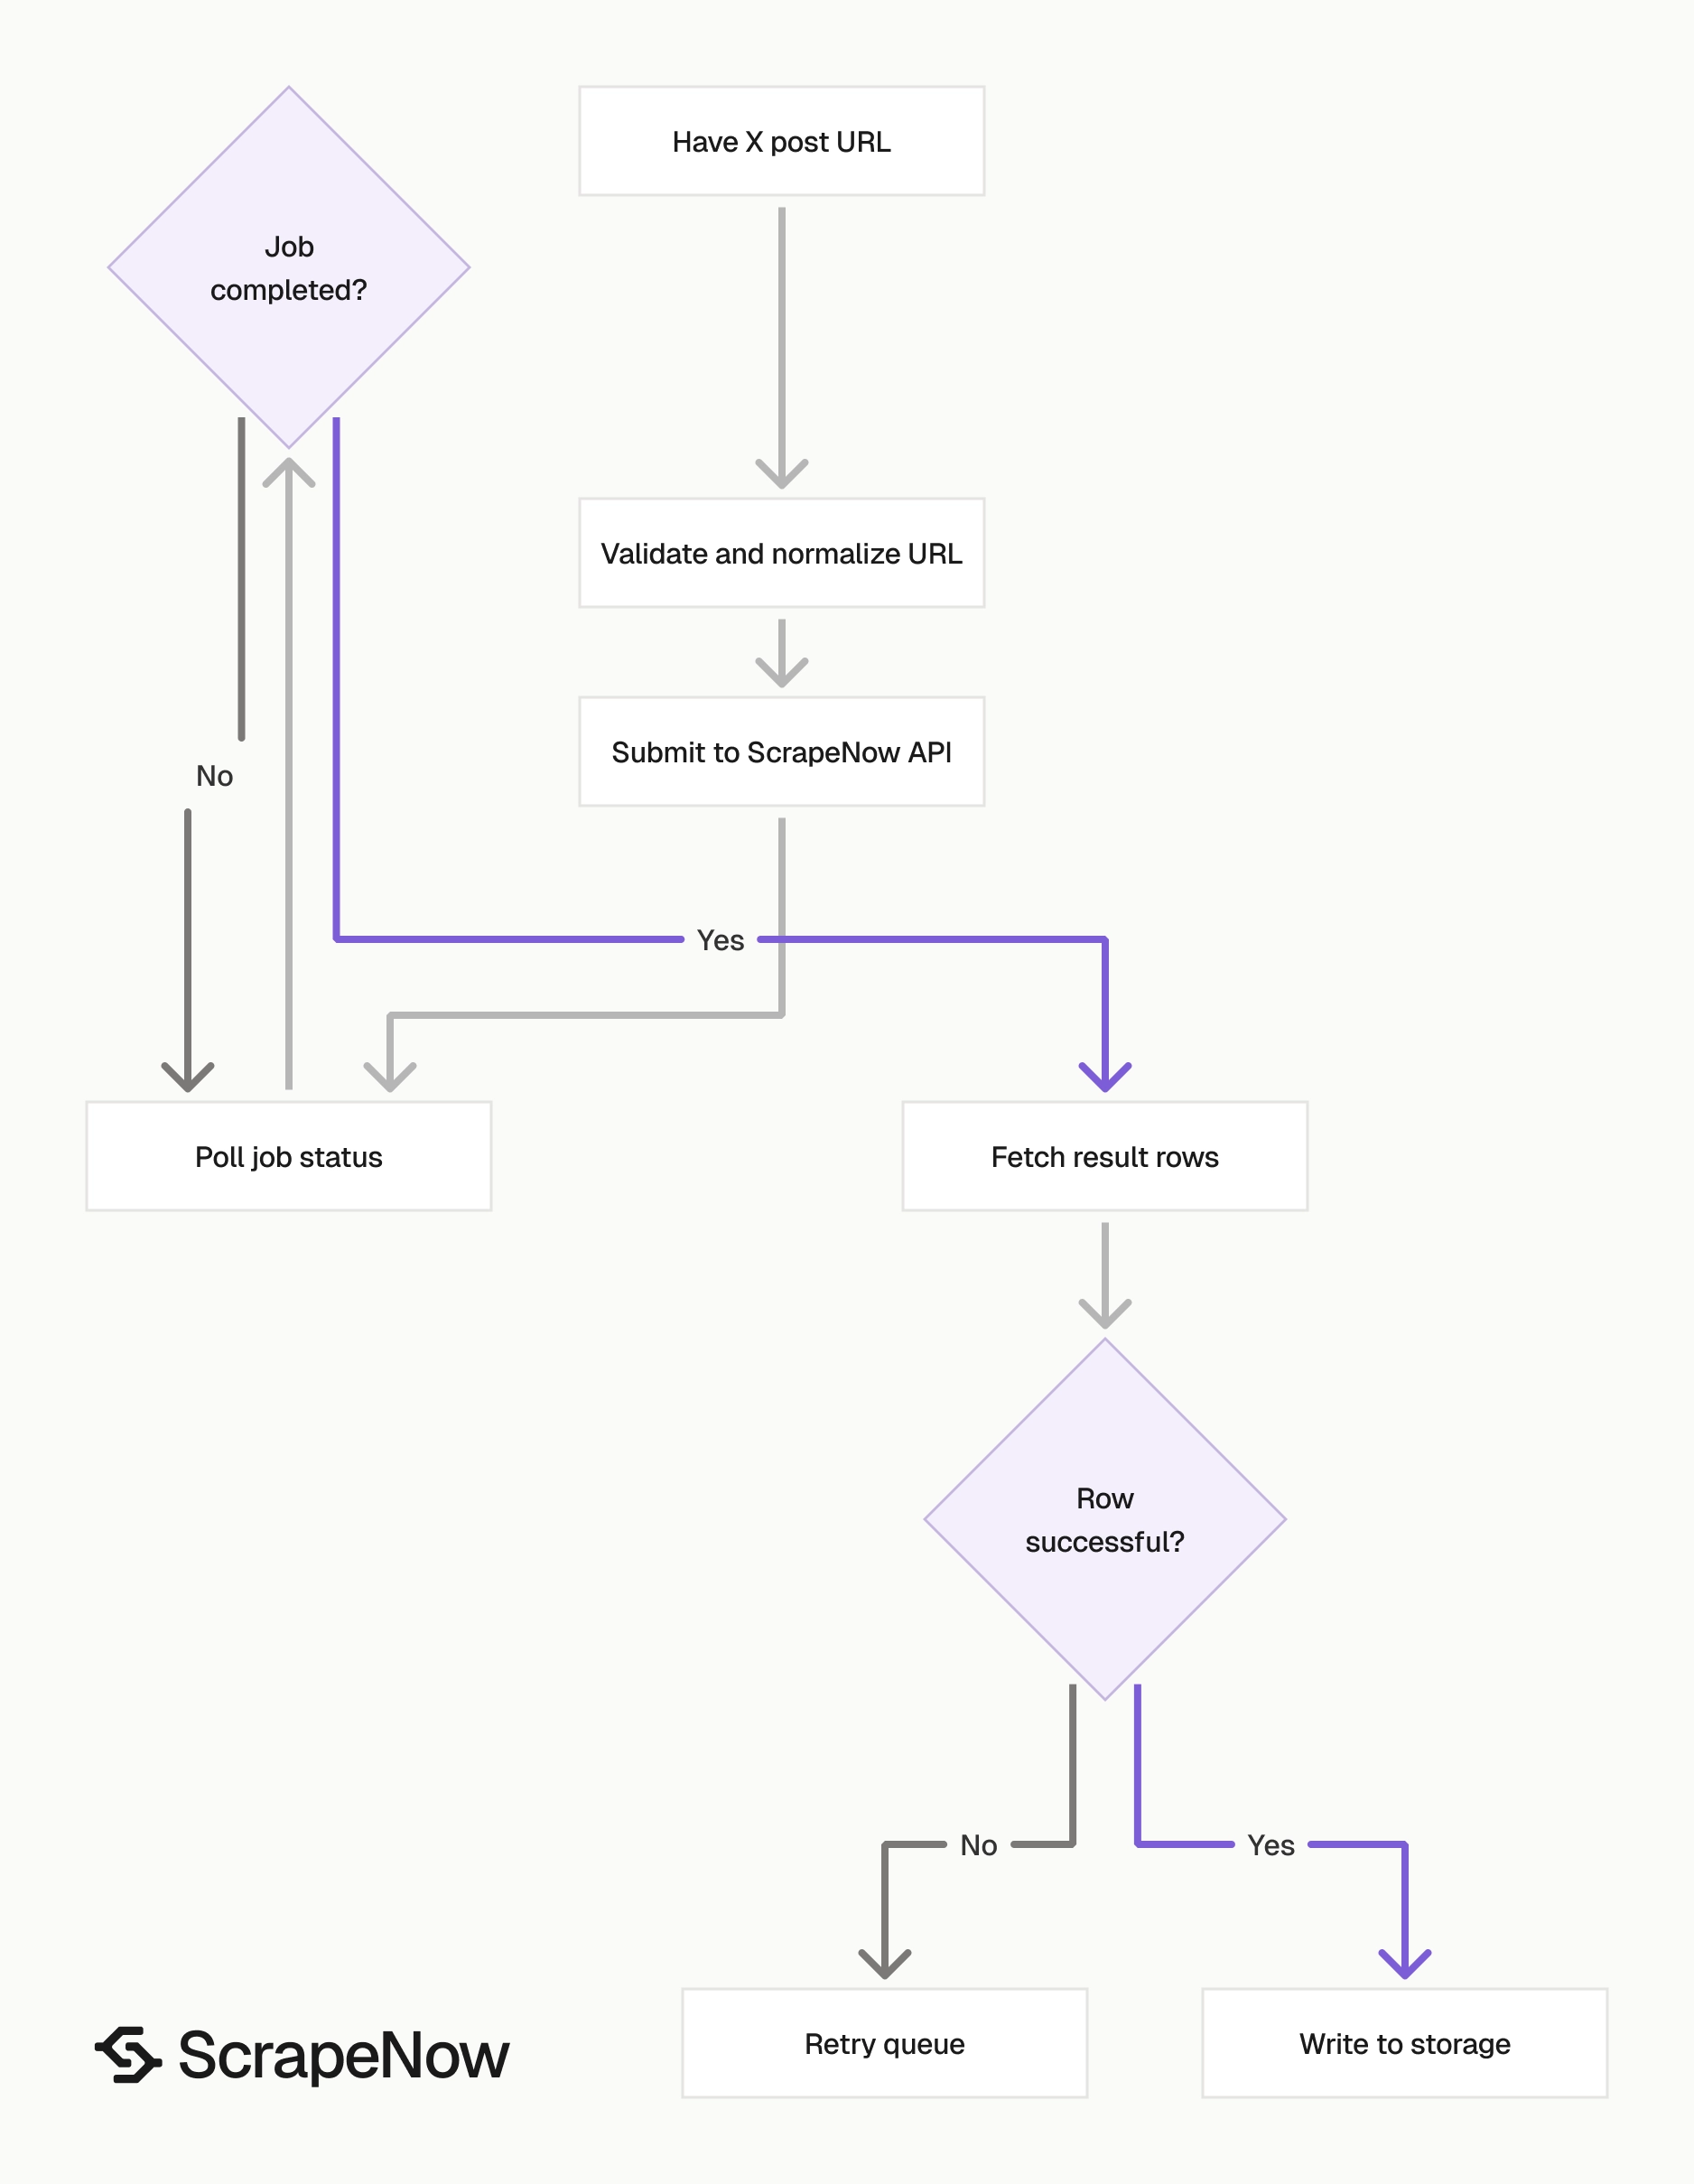
The script starts a scraping job, polls every 5 seconds, waits up to 3600 seconds, and saves the result as JSON. It also creates an output directory before writing the file.
For batches, add more objects to SCRAPER_INPUTS:
SCRAPER_INPUTS = [
    {"url": "https://x.com/taylorswift13/status/2019758757723422893"},
    {"url": "https://x.com/username/status/1234567890123456789"}
]
Use the same input shape for 1 URL or 10,000 URLs. Each returned post maps to one result row.
For large batches, keep the input list stable during retries. Store the original input URL, normalized URL, scrape status, and job ID together.
Step 3. Read the output
The API returns an array of result objects. This trimmed response shows the main fields returned by the X posts scraper:
[
{
"inputs": {
"url": "https://x.com/taylorswift13/status/2019758757723422893"
},
"scrape_status": "success",
"id": "2019758757723422893",
"user_posted": "taylorswift13",
"name": "Taylor Swift",
"description": "My favorite part about writing is that first spark of an idea. It can happen at any time, for any reason. The idea for the Opalite music video crash landed into my imagination when I was doing promo for The Life of a Showgirl. I was a guest on one of my favorite shows, @TheGNShow. For those of you who aren’t familiar, it’s a UK late night show where Graham Norton (the insanely charismatic and lovable host) invites a random group of actors, entertainers, musicians, etc to be on his show and we all sit there and chat like it’s a dinner party. They even serve wine. Anyway. I remember thinking I got ridiculously lucky with the group I was paired with. Cillian Murphy, Domhnall Gleeson, Greta Lee, Jodie Turner-Smith, and @LewisCapaldi. All people whose work I’ve admired from afar. When we were all talking during the broadcast, Domhnall made a light hearted joke about wanting to be in one of my music videos. He’s Irish! He was joking! Except that in that moment during the interview, I was instantly struck with an *idea*. And so a week later he received an email script I’d written for the Opalite video, where he was playing the starring role. I had this thought that it would be wild if all of our fellow guests on the Graham Norton show that night, including Graham himself, could be a part of it too. Like a school group project but for adults and it isn’t mandatory. To my delight, everyone from the show made the effort to time travel back to the 90’s with us and help with this video. You might even recognize some friendly faces from The Eras Tour. I got to work with one of my favorite people in the world, Rodrigo Prieto, again! I had more fun than I ever imagined - Made new friends, metaphors, and fashion choices. It was an absolute thrill to create this story and these characters. Shot on film. The Opalite video is out now on Spotify & Apple Music.\n",
"date_posted": "2026-02-06T13:03:07.000Z",
"photos": [
"https://pbs.twimg.com/media/HAef4F9XsAAuwrv.jpg",
"https://pbs.twimg.com/media/HAef4F6WcAAYnXN.jpg",
"https://pbs.twimg.com/media/HAef4F7WoAAFt21.jpg",
"https://pbs.twimg.com/media/HAef4F8WAAAGLbA.jpg"
],
"url": "https://x.com/taylorswift13/status/2019758757723422893",
"quoted_post": {
"photos": null,
"videos": null
},
"tagged_users": null,
"replies": 6323,
"reposts": 43954,
"likes": 198414,
"views": 7984339,
"external_url": null,
"hashtags": null,
"followers": 79831025,
"biography": "And, baby, that’s show business for you. New album The Life of a Showgirl. Available Now ❤️🔥",
"posts_count": 884,
"profile_image_link": "https://pbs.twimg.com/profile_images/2019199672955387904/KoSJY5W-_normal.jpg",
"fo": "... truncated"
}
]
Use scrape_status before writing records to production tables. A completed job means the job ended, while each row still needs its own status check.
Engagement counts represent the values seen during the scrape. If you scrape the same post later, likes, replies, reposts, and views can change.
What data you get back
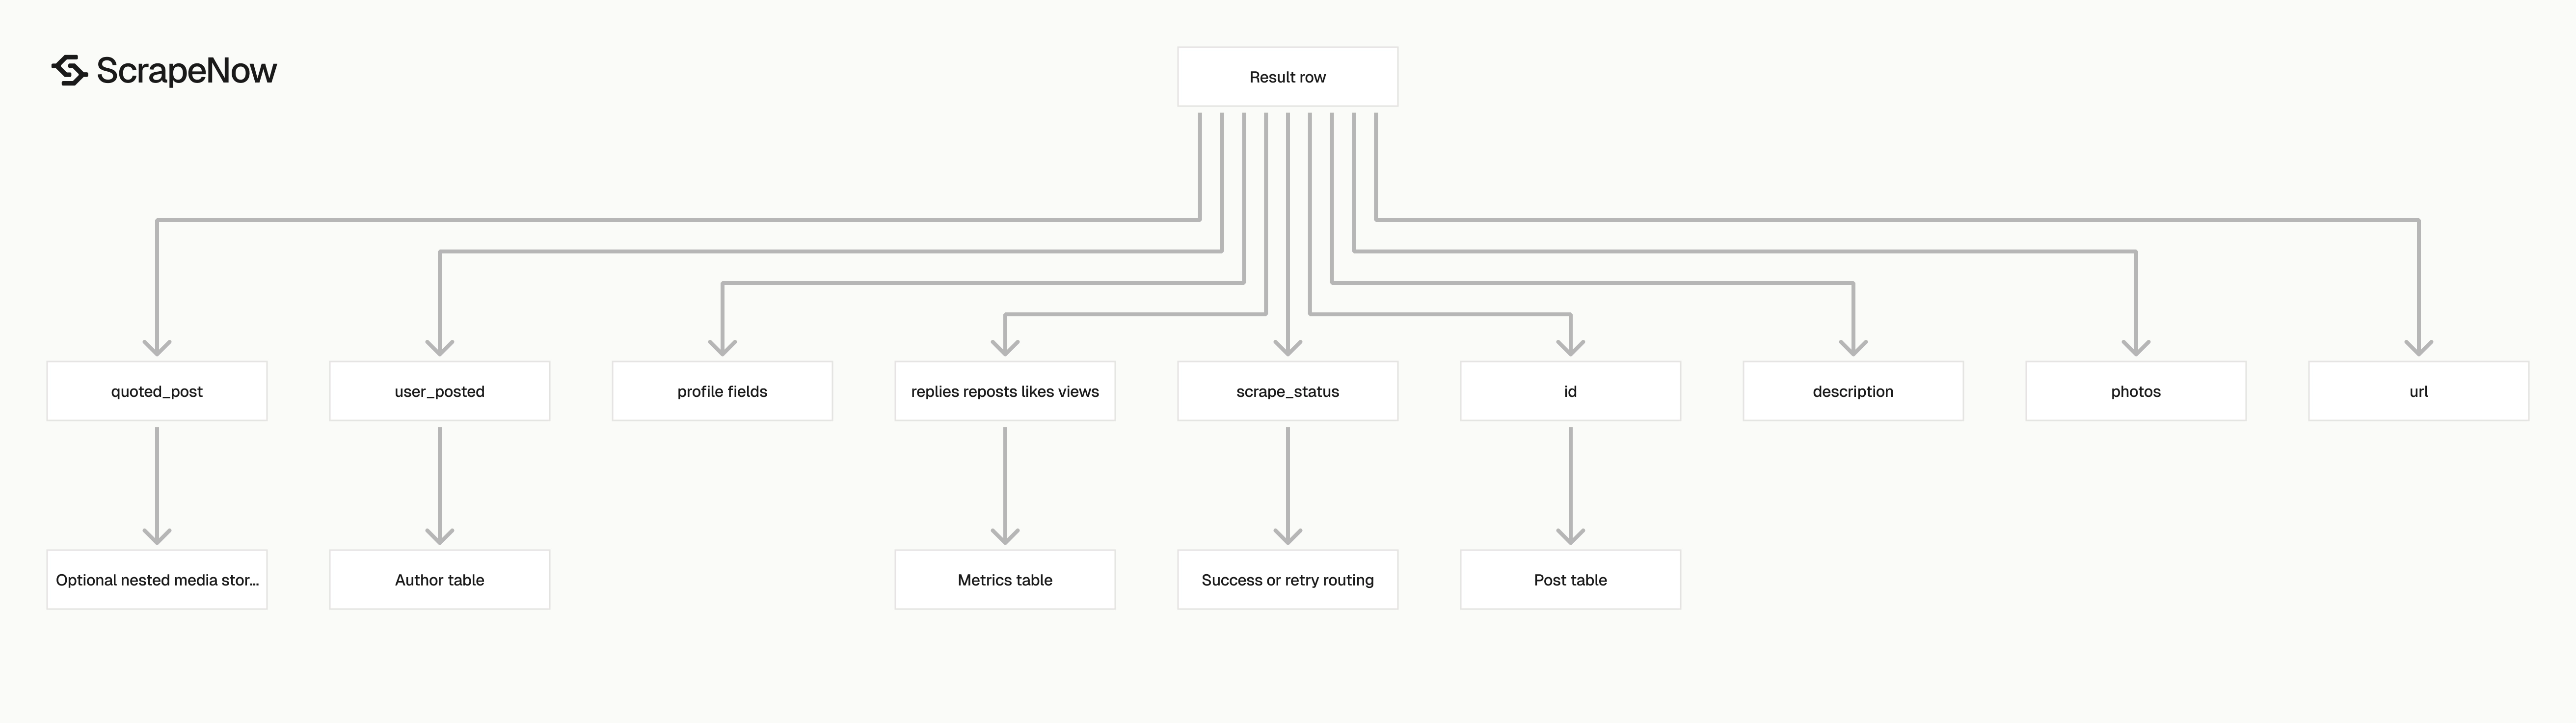
The response is built for post-level storage. You get the input URL, scrape status, post identity, author identity, content, media, engagement counts, and profile fields in one record.
| Field | Type | What it gives you |
|---|---|---|
inputs.url |
string | The URL you submitted |
scrape_status |
string | success or the scrape result state |
id |
string | X post ID from the status URL |
user_posted |
string | Author username |
name |
string | Author display name |
description |
string | Full post text |
date_posted |
string | ISO timestamp |
photos |
array | Media image URLs attached to the post |
url |
string | Canonical post URL |
quoted_post |
object | Quoted post media fields when present |
tagged_users |
array or null | Users tagged in the post |
replies |
number | Reply count |
reposts |
number | Repost count |
likes |
number | Like count |
views |
number | View count |
external_url |
string or null | Outbound link in the post |
hashtags |
array or null | Hashtags in the post |
followers |
number | Author follower count |
biography |
string | Author bio |
posts_count |
number | Author post count |
profile_image_link |
string | Author profile image URL |
Ready to get this data? Extract X post data.
Use id as the primary key for the post table. X status IDs stay stable across copied URLs, tracking parameters, and repeated scrapes.
Use user_posted as the foreign key into an author table if you also run ScrapeNow’s Get X profile data scraper. If you start with handles, the Look up X profiles by username scraper returns profile records from usernames.
Store engagement counts separately if you track post growth over time. A single post row works for audits, while a time-series table works better for trend tracking.
Production tips
Validate the fields you write, allow nullable fields where the schema allows them, and route failed rows outside your main insert path.
Validate input URLs before sending jobs
Reject invalid URLs before they hit the API. This saves credits and makes failed jobs faster to debug.
import re

POST_URL_RE = re.compile(r"^https://x\.com/[^/]+/status/\d+")


def validate_post_urls(urls: list[str]) -> list[dict]:
    valid_inputs = []

    for url in urls:
        clean_url = url.strip().split("?")[0]

        if not POST_URL_RE.match(clean_url):
            raise ValueError(f"Invalid X post URL: {url}")

        valid_inputs.append({"url": clean_url})

    return valid_inputs


SCRAPER_INPUTS = validate_post_urls([
    "https://x.com/taylorswift13/status/2019758757723422893?ref_src=twsrc"
])
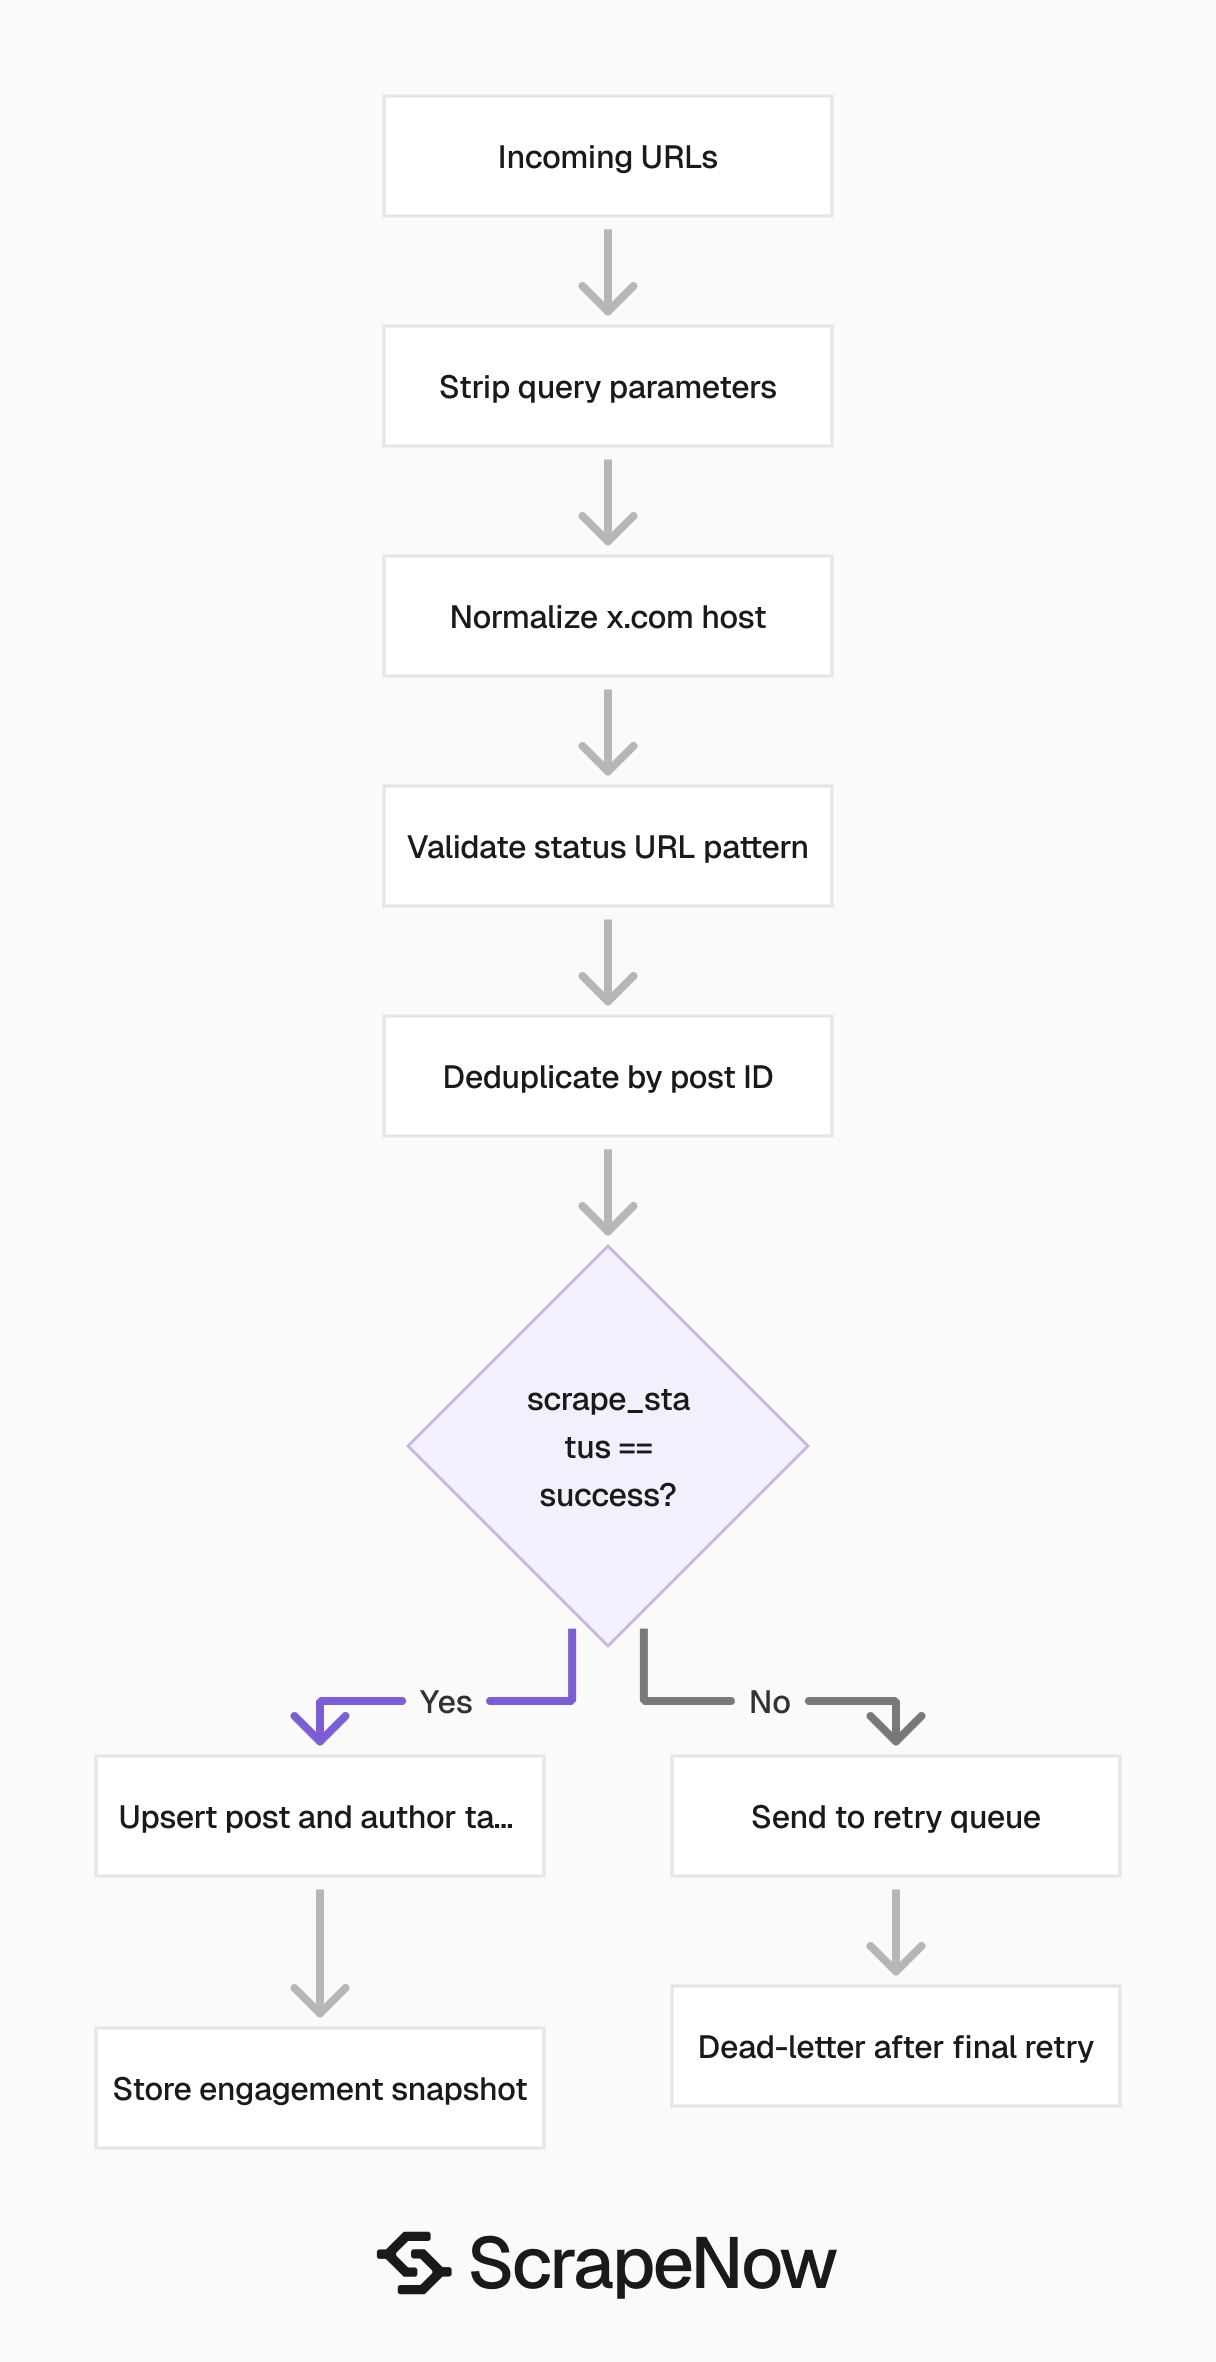
Strip query strings before storage. Normalize twitter.com links to x.com.
def normalize_x_post_url(url: str) -> str:
    clean_url = url.strip().split("?")[0]
    return clean_url.replace("https://twitter.com/", "https://x.com/")
Deduplicate by post ID
Store one row per id.
def dedupe_results(results: list[dict]) -> list[dict]:
    seen = set()
    rows = []

    for row in results:
        post_id = row.get("id")
        if not post_id:
            continue

        if post_id in seen:
            continue

        seen.add(post_id)
        rows.append(row)

    return rows
Use id for idempotent upserts. If a post gets more likes or views later, update the engagement fields on the existing row.
For historical analytics, write each scrape to a separate metrics table. Use (post_id, scraped_at) as the key for engagement snapshots.
Split post fields from author fields
Store post data and author data in separate tables.
CREATE TABLE x_posts (
    id TEXT PRIMARY KEY,
    url TEXT NOT NULL,
    user_posted TEXT NOT NULL,
    description TEXT,
    date_posted TIMESTAMP,
    replies INTEGER,
    reposts INTEGER,
    likes INTEGER,
    views INTEGER,
    external_url TEXT,
    scraped_at TIMESTAMP DEFAULT CURRENT_TIMESTAMP
);

CREATE TABLE x_authors (
    username TEXT PRIMARY KEY,
    name TEXT,
    biography TEXT,
    followers INTEGER,
    posts_count INTEGER,
    profile_image_link TEXT,
    scraped_at TIMESTAMP DEFAULT CURRENT_TIMESTAMP
);
This prevents repeated writes of author profile fields across every post row.
Track engagement history when counts matter
Post engagement changes after publication. Store snapshots if your reporting needs growth curves, hourly movement, or campaign summaries.
CREATE TABLE x_post_metrics (
    post_id TEXT NOT NULL,
    replies INTEGER,
    reposts INTEGER,
    likes INTEGER,
    views INTEGER,
    scraped_at TIMESTAMP DEFAULT CURRENT_TIMESTAMP,
    PRIMARY KEY (post_id, scraped_at)
);
Write one row to x_posts for the post body. Write one row to x_post_metrics for each scrape run.
Route failed rows into a retry queue
Check scrape_status for every result.
def split_success_and_retry(results: list[dict]) -> tuple[list[dict], list[dict]]:
    success = []
    retry = []

    for row in results:
        if row.get("scrape_status") == "success" and row.get("id"):
            success.append(row)
        else:
            retry.append(row.get("inputs", {}))

    return success, retry
Retry failed inputs with backoff. Move the URL to a dead-letter table after the final retry.
Keep nullable fields nullable
Fields like hashtags, tagged_users, external_url, and quoted_post.photos can be null. Store them as null values instead of empty strings.
CREATE TABLE x_post_media (
    post_id TEXT NOT NULL,
    media_type TEXT NOT NULL,
    media_url TEXT NOT NULL,
    position INTEGER NOT NULL,
    PRIMARY KEY (post_id, media_url)
);
Keep schema checks close to ingestion
Validate required fields before database writes.
REQUIRED_SUCCESS_FIELDS = ("id", "url", "user_posted", "scrape_status")


def validate_success_row(row: dict) -> None:
    missing = [field for field in REQUIRED_SUCCESS_FIELDS if not row.get(field)]

    if missing:
        raise ValueError(f"Missing fields on result row: {missing}")
Run this check after you split successful rows from retry rows.
Where this fits with other X scrapers
Use the post scraper when you already have post URLs. Use profile scrapers when your input is a username, profile URL, or account list.
| Job | Input | Scraper |
|---|---|---|
| Extract one or more posts | X status URL | Extract X post data |
| Extract a known profile | X profile URL | Get X profile data |
| Find a profile from a handle | Username | Look up X profiles by username |
A common pipeline starts with profile search, expands to profile extraction, then collects post URLs for post extraction. Keep each step separate so retries stay small and observable.
The full ScrapeNow catalog has 86+ pre-built scrapers across 14 platforms in the Browse all 86+ scrapers. For a broader X scraping setup, the X scraper guide covers account discovery, post collection, and run planning.
Pricing
ScrapeNow charges per returned row. One row costs one credit, starting at $0.04 per credit for small runs and dropping with volume. No monthly contracts, no proxy fees, no charges for failed rows. See the pricing page for current rates.
Run the Extract X post data scraper with one post URL first. Confirm the schema against your storage table, then batch 100 URLs.
After the first batch, dedupe by id, split post and author fields, and route failed rows to a retry queue. That gives you a production-ready path before you move to larger runs.